General
Converter
How to Convert a World
LCE to Java
Java to LCE
LCE to Bedrock
Pruner
How to Convert a Minecraft World from Java to PS4/PS5
Play your favorite Java worlds with a controller on PlayStation 4 or PlayStation 5.
The Universal Minecraft Tool is the best tool for the job.
This guide will show you how to easily convert your world to Bedrock edition first, and then we'll cover how to transfer that world to your PlayStation console itself.
Table of Contents:
- Don't Ruin Your World - Use the UMT
- Step 1: Open the Input Java World
- Step 2: Select Bedrock as the Output Edition
- Step 3: Conversion Options
- Step 4: Convert
- Step 5: Save the Bedrock World
- Step 6: Upload to Realms
- Step 7: Download from Realms
Don't Ruin Your World - Use the UMT
Did you know that when Minecraft updates, only the parts of your world you visit will actually be updated? This can be a problem for converters.
For example, in the 1.18 Caves and Cliffs update the world height was expanded (0 to 255 became -64 to 320).
So, if your world was played on anything before 1.18 at any point and was also played on or after 1.18 at any point, then only those recently visited chunks have the new world height.
After conversion, all the pre-1.18 chunks will become empty under Y:0 where new terrain is supposed to be! Minecraft won't see anything wrong with that since it can't tell the difference between a converted chunk and one you might have just dug out by hand.
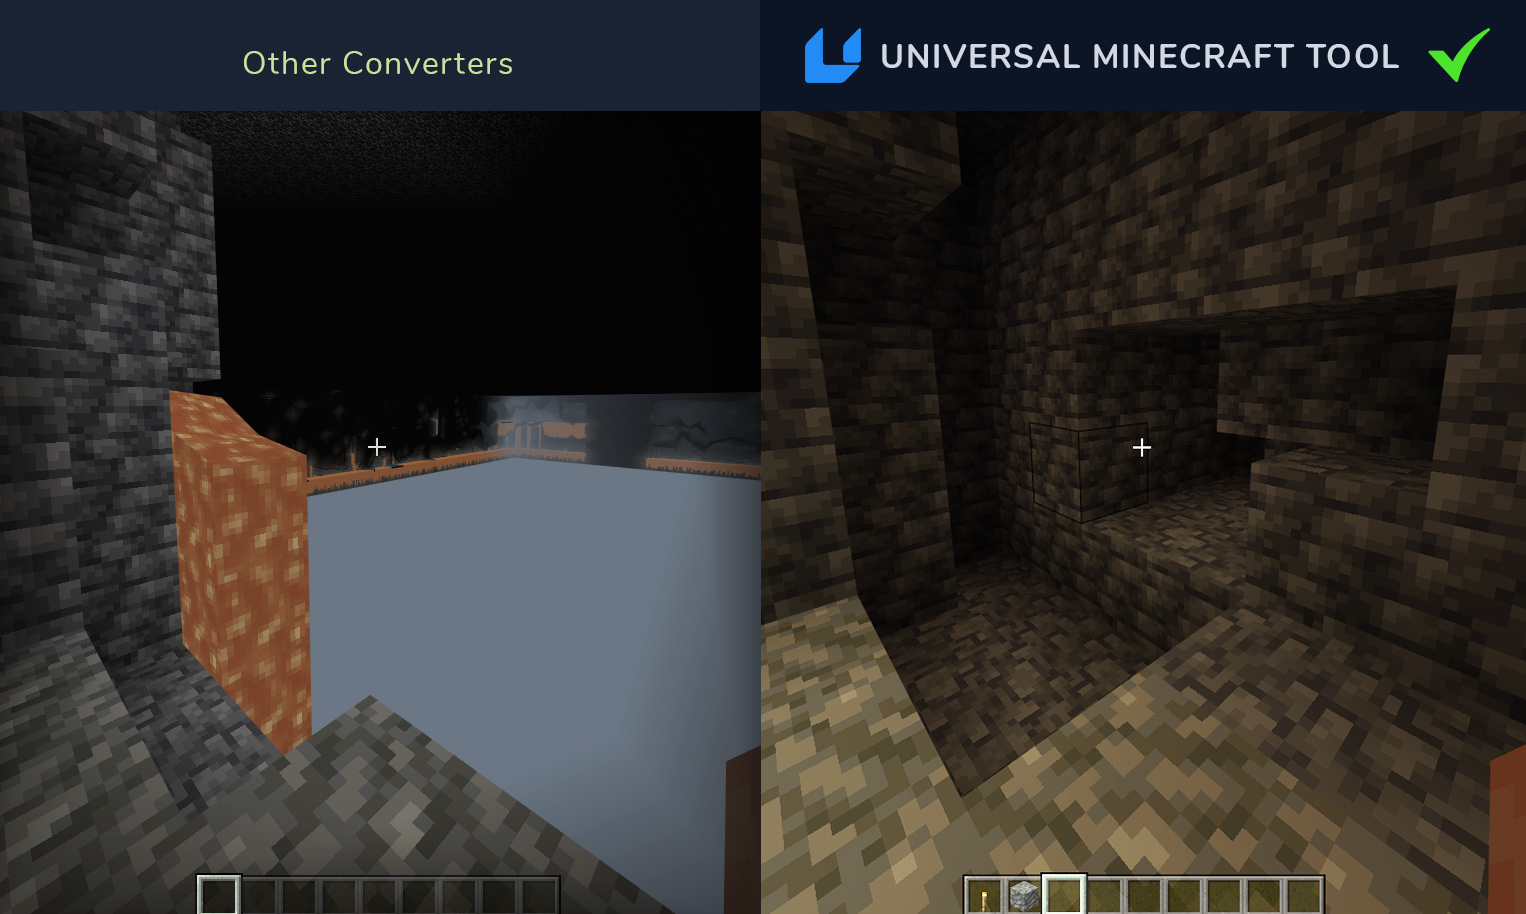
Only the Universal Minecraft Tool supports a feature called Allow Older Chunk Versions which detects scenarios like this and properly formats the output chunks to signal to Minecraft that the terrain needs to be updated.
For this reason alone, the Universal Minecraft Tool is the only proper tool for the job.
But there are other reasons too:
- Unlimited world size (others limit you to 500MB)
- Full item conversion (enchantments, written books, etc)
- All entities and tile entities are supported
- Proto chunk skipping (others leave gaping holes in your world)
- Terrain blending flags (others ignore this)
- Snapshot support
- 2D and 3D biome conversion
- Full product support with a guarantee
And so many more!
Step 1: Open the Input Java World
To begin, you'll need to tell to the UMT which world you're trying to convert.
Follow this guide to Open a Java World in the Universal Minecraft Tool
Step 2: Select Bedrock as the Output Edition
Click Bedrock to select it as the target output edition.
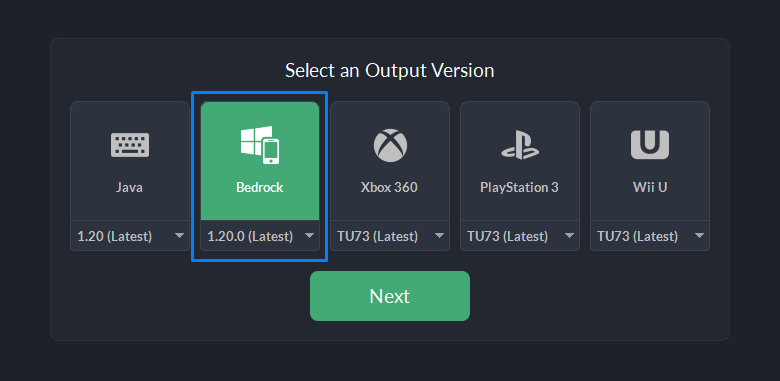
You'll notice a drop-down menu for selecting different target versions. This can be useful if you're trying to get more advanced with your world conversion, but for most cases you'll want to leave it on the latest version.
Click Next to continue.
Step 3: Conversion Options
This panel allows you to control certain technical aspects of how the conversion should run. Thankfully, for Java to Bedrock conversion you'll usually want to leave these at their default values.
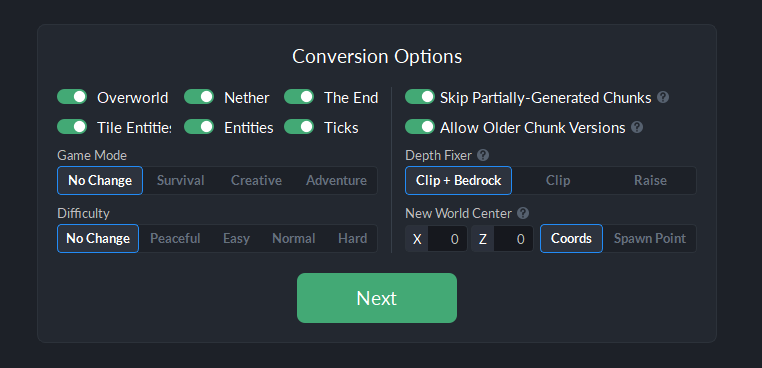
Two very important settings you'll likely want to keep enabled are the Skip Partially-Generated Chunks and Allow Older Chunk Versions features. Both are crucial to ensuring you don't have any holes or empty spots in your world (as we mentioned earlier).
One Important Exception
If you are converting a flatland world created on or after 1.18 to a version before 1.18, then you'll want to set the Depth Fixer conversion option to Raise.
This will raise your world up by 64 blocks ensuring the bottom of your world is repositioned from Y:-64 to Y:0.
Step 4: Convert
It's the big moment!
Click Start Conversion to begin.
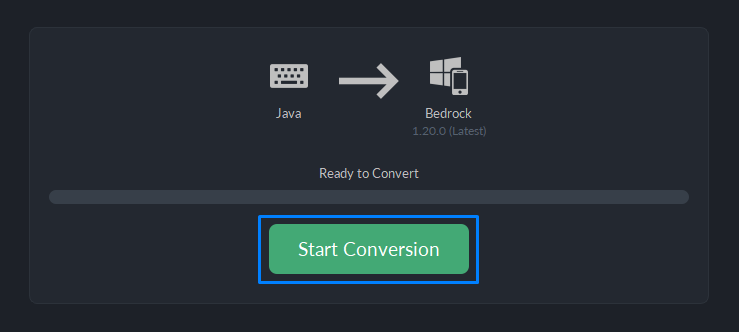
The UMT will now scan the input world and perform all the necessary conversion steps to create a super-accurate clone of your world for Bedrock edition.
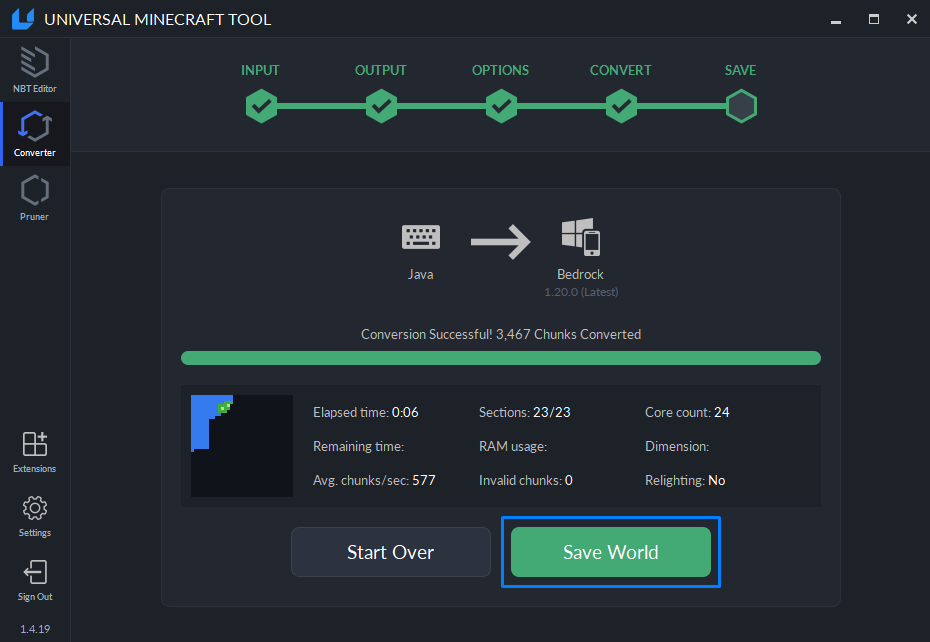
Step 5: Save the Bedrock World
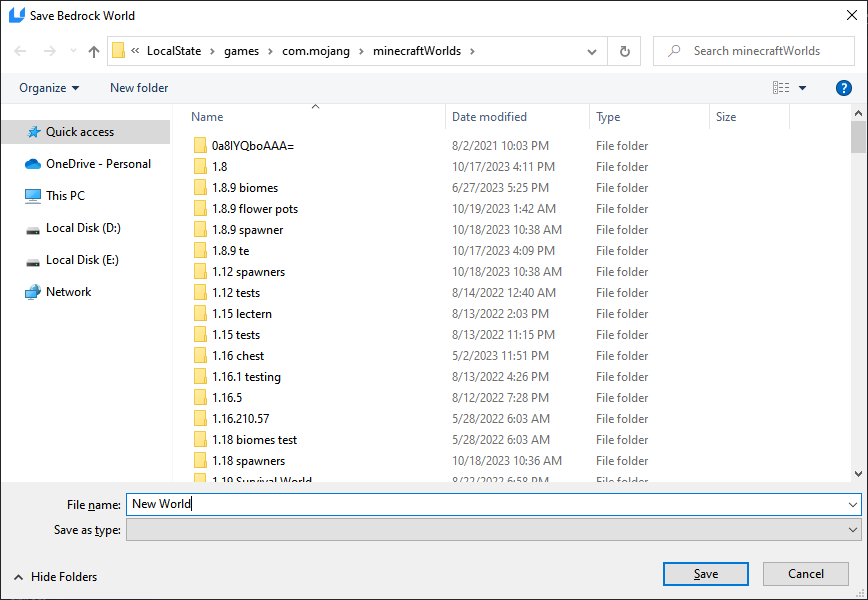
The next step is to pick a spot to save the output world.
Click Save World to bring up the save window.
The UMT will default to the install location of your Windows 10 edition worlds. You will need Minecraft Windows 10 edition installed in order to transfer the world in the next step with Realms.
Enter a name for the world, and click Save.
Step 6: Upload to Realms
You'll need a Realms Plus subscription to move your world from Minecraft Windows 10 edition to your PlayStation console.
The free trial of Realms Plus will work, thankfully!
Plus, having a Realms server is super handy, or you can always cancel your subscription if you choose not to continue.
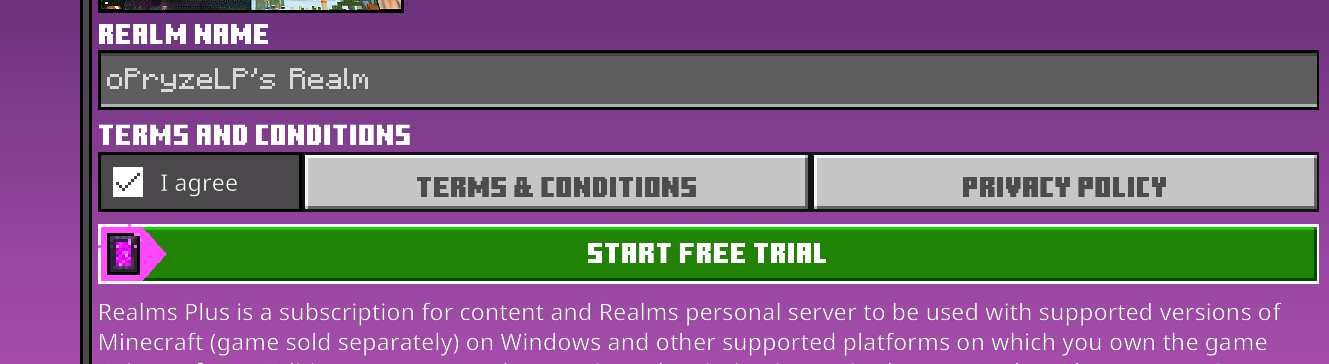
Click the Realms Plus banner near the top of the main menu.
Start a free trial of Realms Plus.
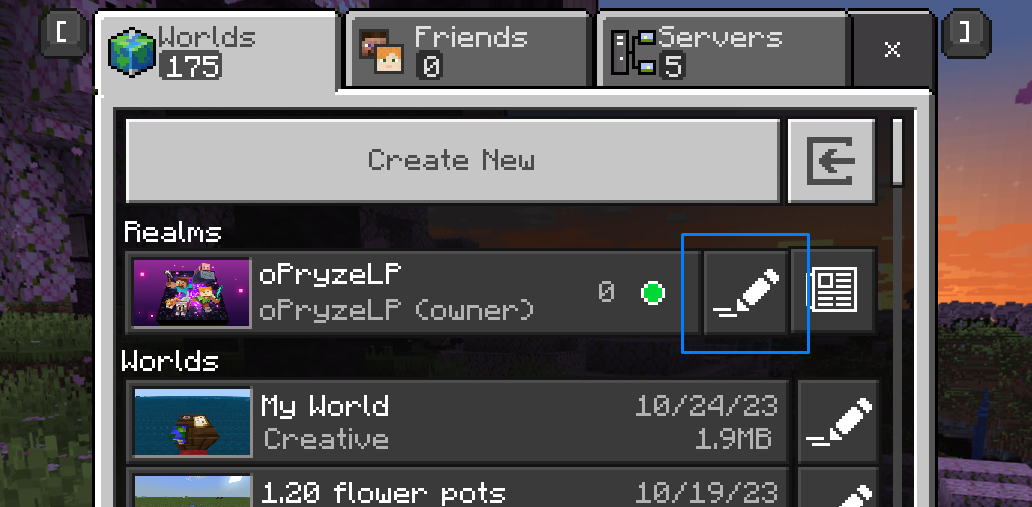
You should see your Realms server activated where the banner used to be.
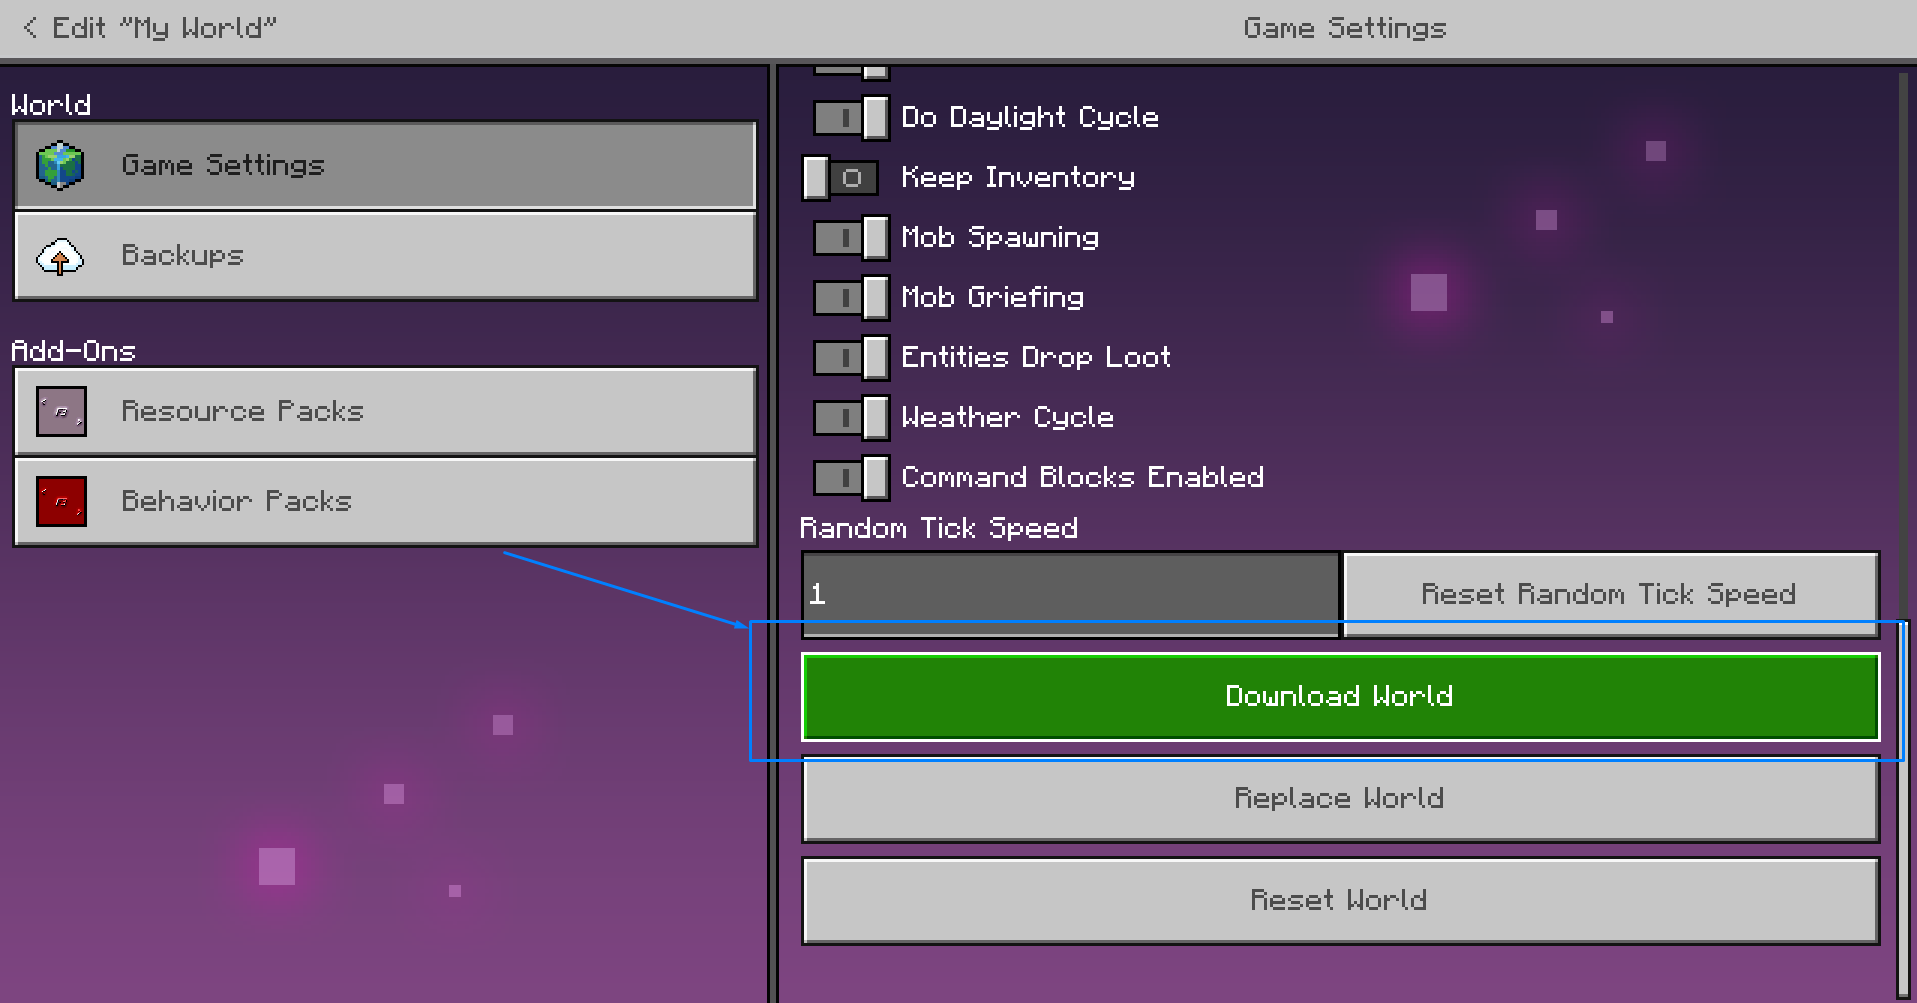
Click Edit on your Realms server.
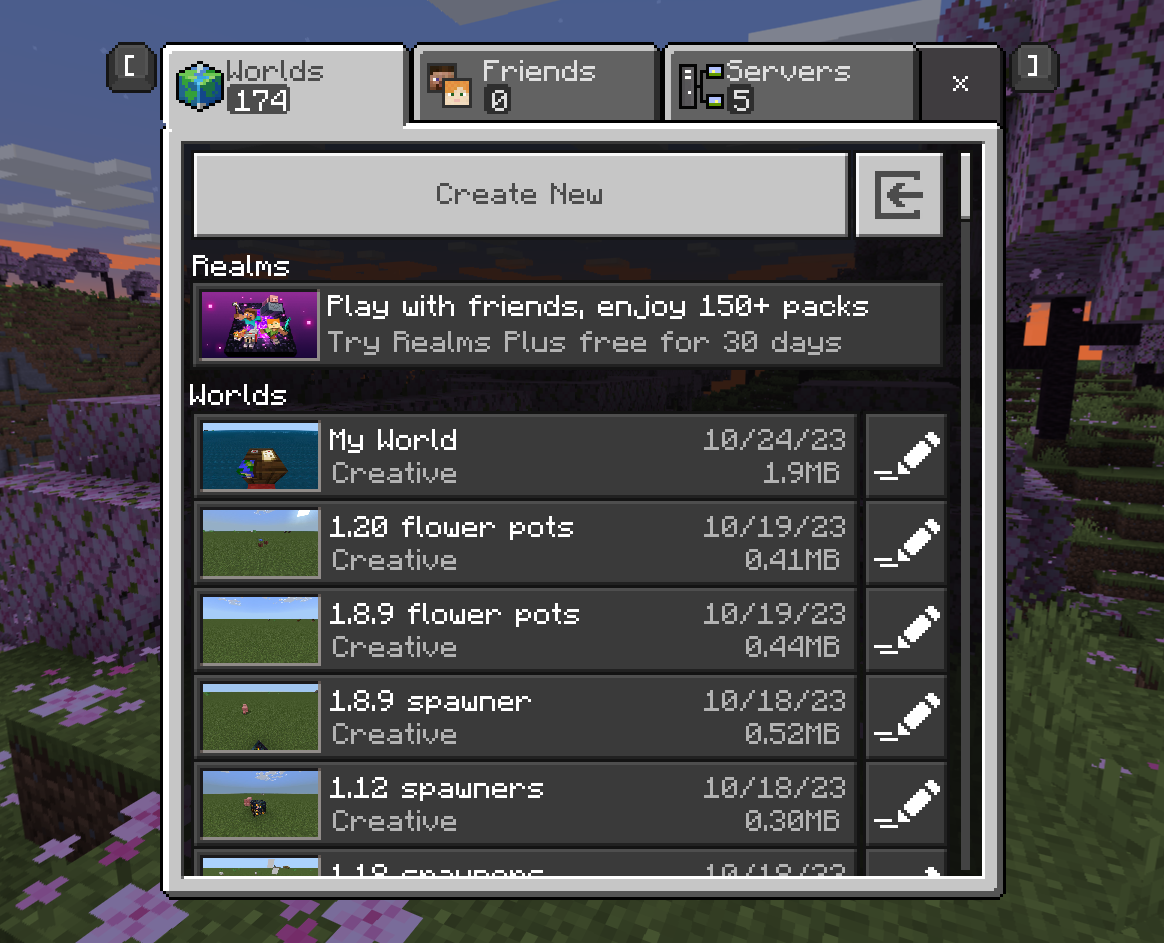
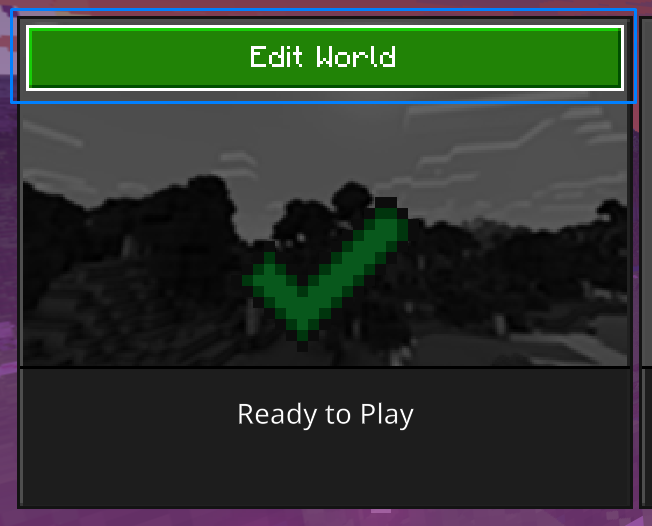
Click Edit World in the Ready to Play section.
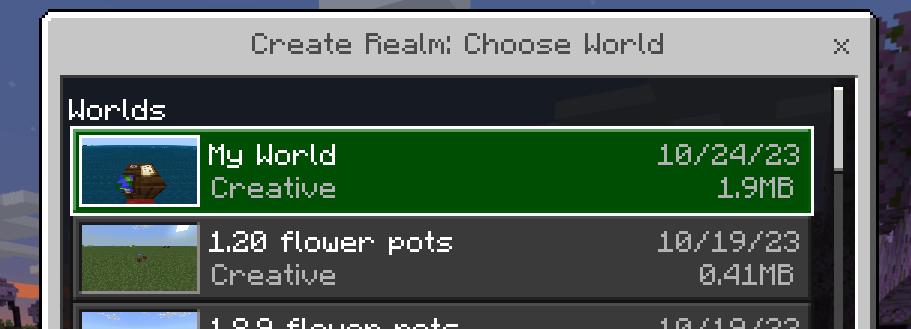
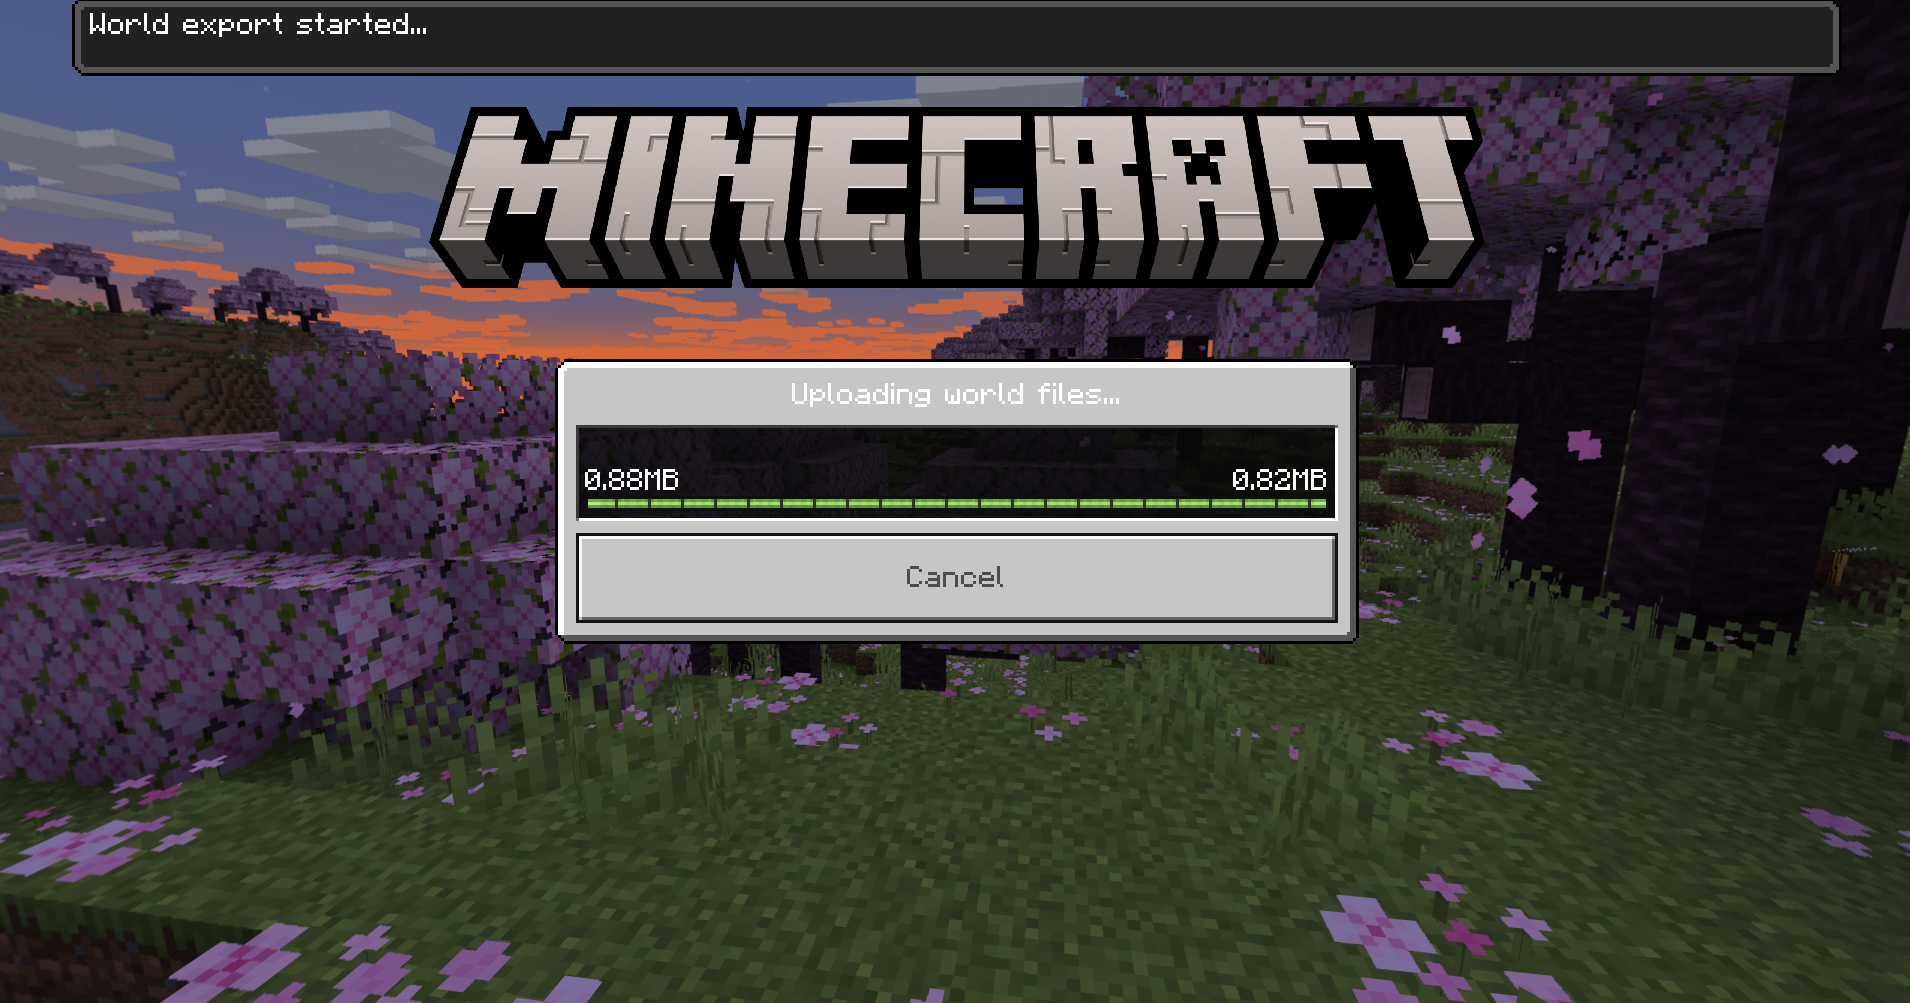
On the right settings panel, scroll all the way down and choose Upload World.
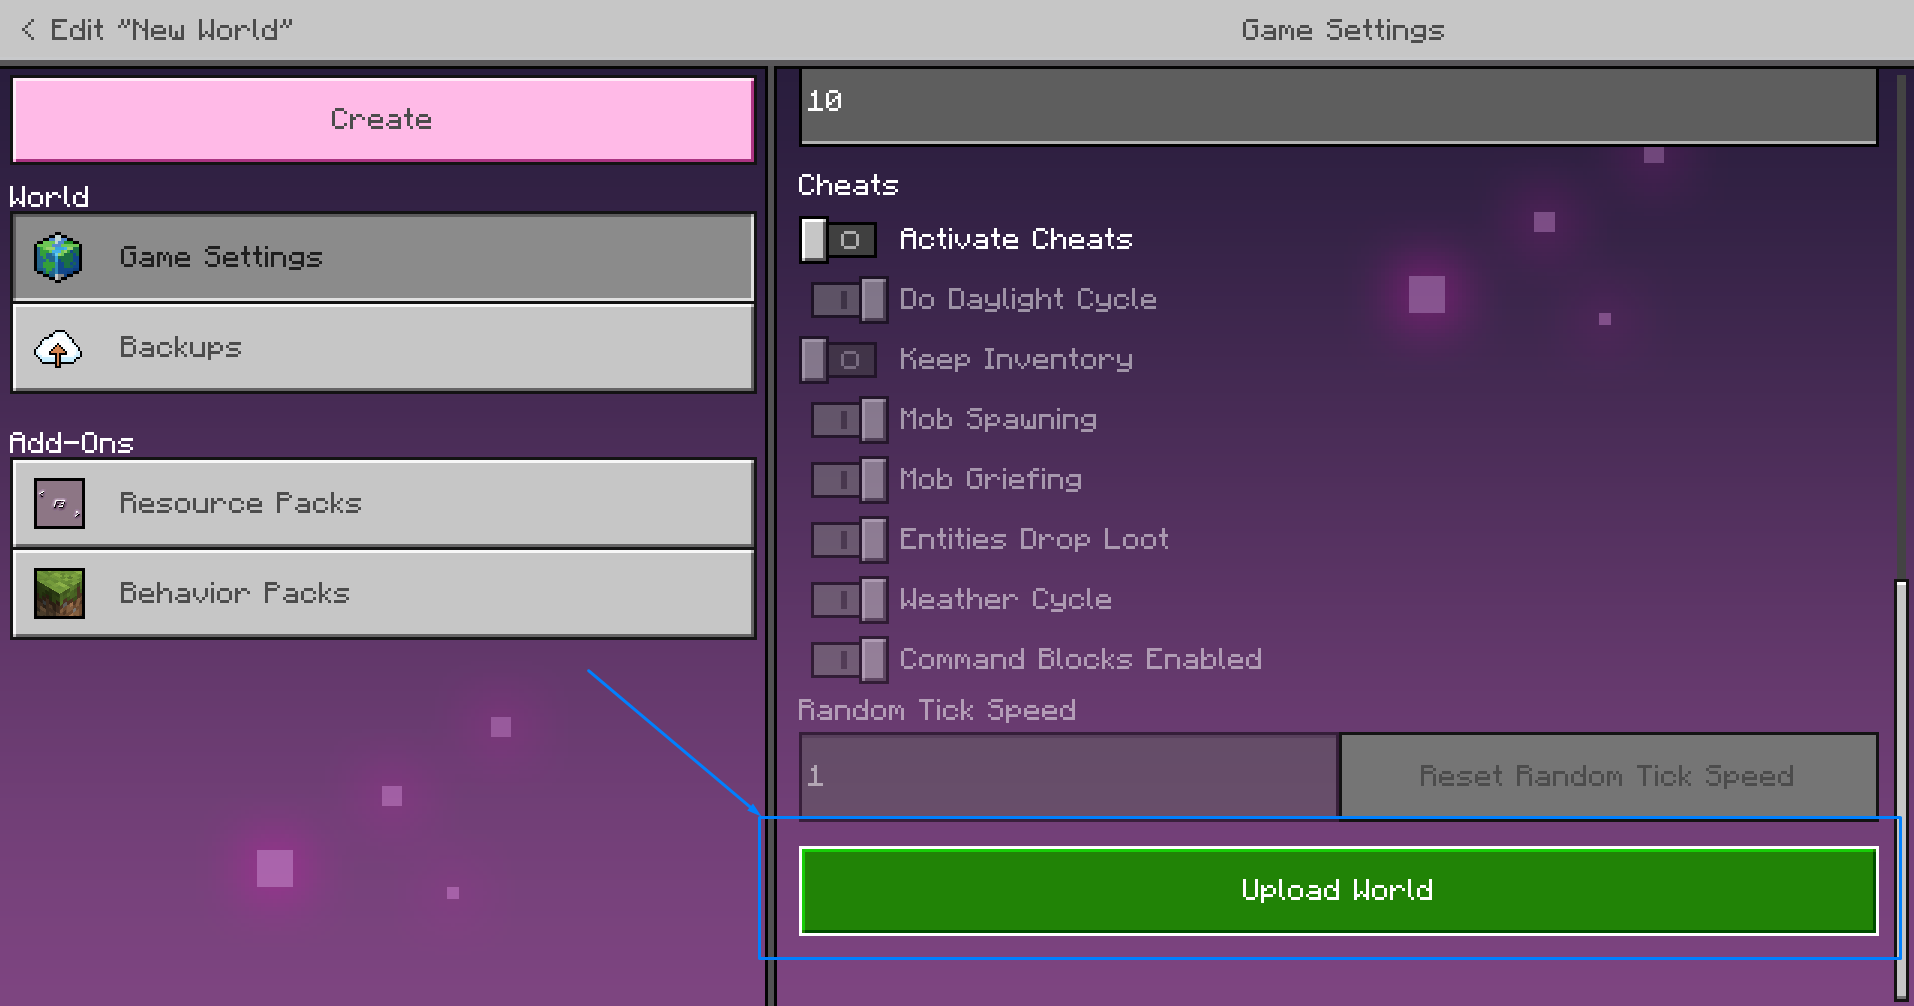
Choose the world we just converted earlier.
Step 7: Download from Realms
Head on over to Minecraft on your PlayStation console.
Make sure you are signed into the same account you purchased Realms with!
Head back into the same page where you uploaded the world, except this time we'll download it.
On the right settings panel, scroll all the way down and choose Download World.
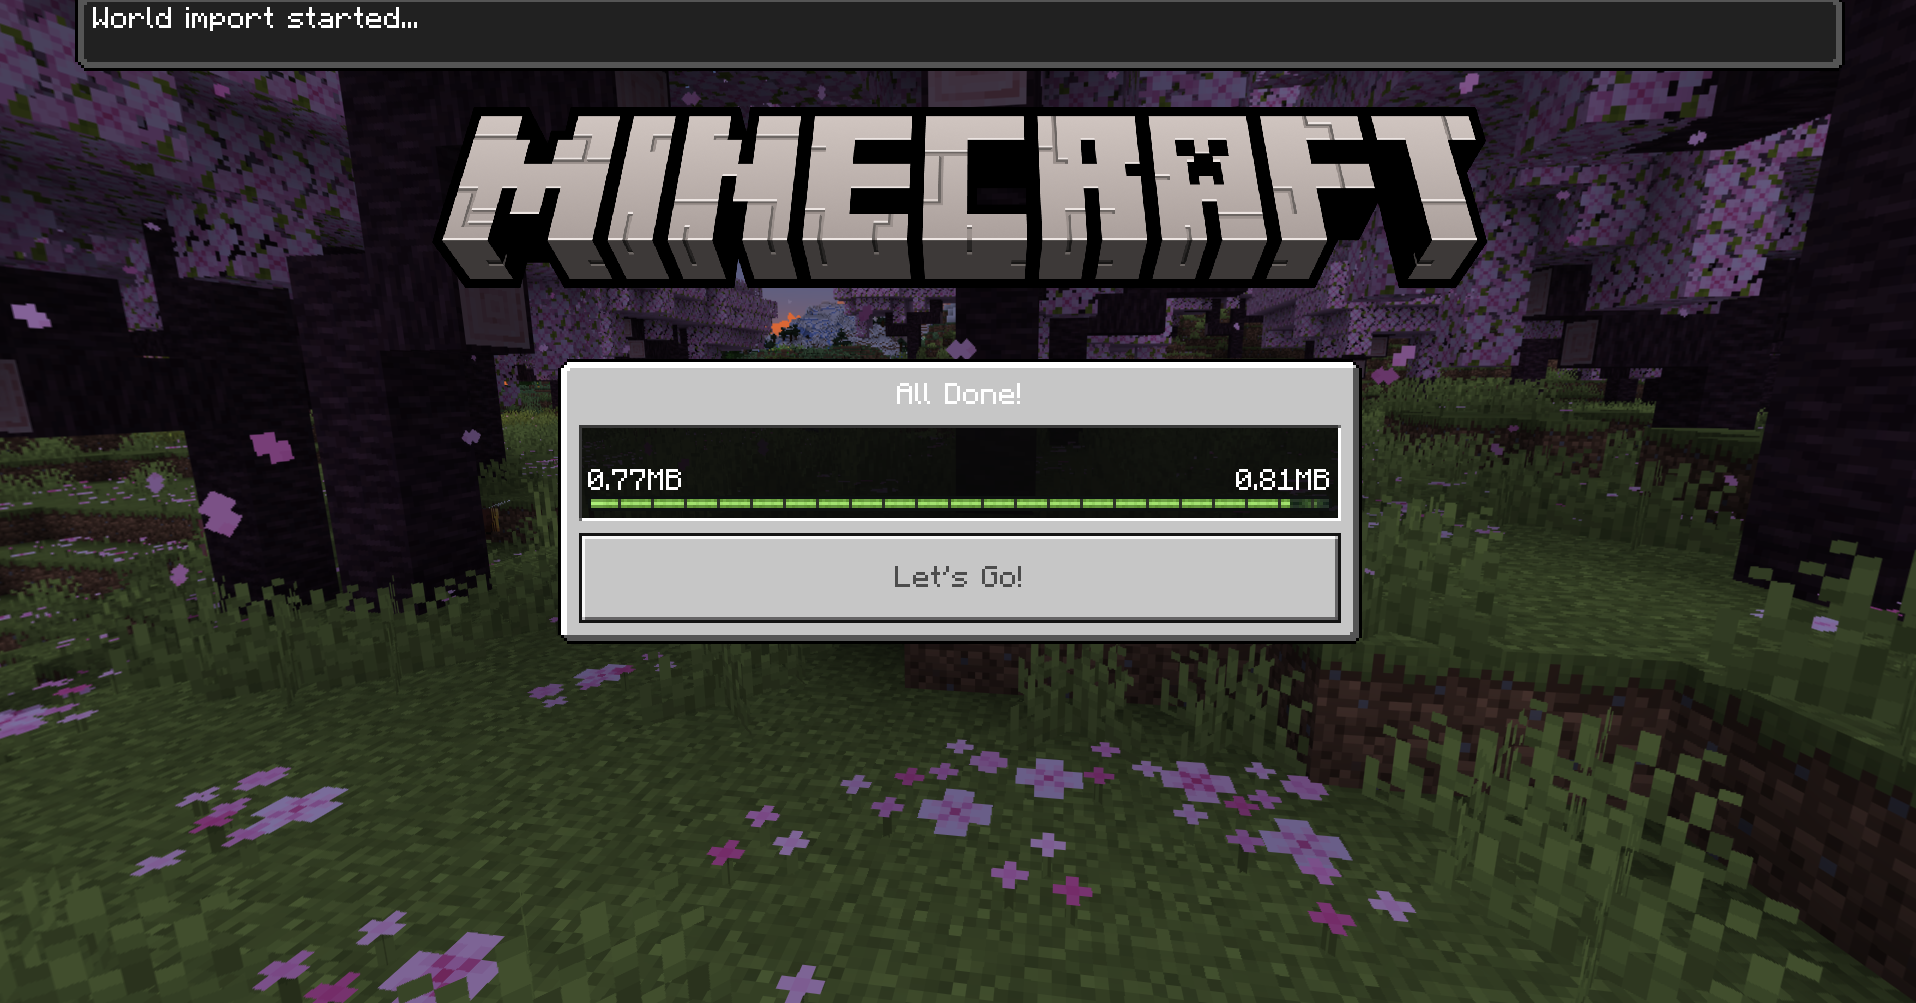
Congratulations! You've successfully converted and transferred the world to your PlayStation console!