General
Converter
How to Convert a World
LCE to Java
Java to LCE
LCE to Bedrock
Pruner
How to Convert a Minecraft World from Wii U to iOS
Take your most nostalgic worlds on the go by converting them to iOS!
Relive them with all the updated blocks and features available today.
We'll convert the world to Bedrock since iOS runs that edition, and then we'll cover how to transfer the world to your iOS device with iCloud.
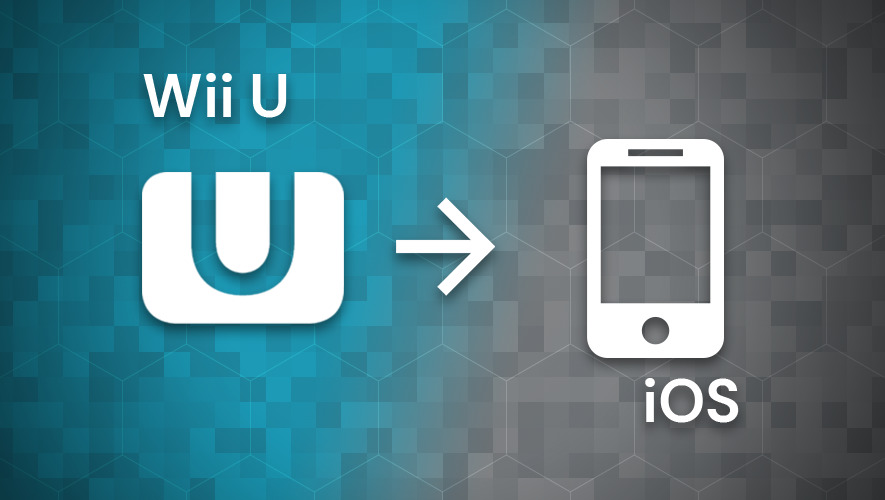
Table of Contents:
- Step 1: Open the Input Wii U World
- Step 2: Select Bedrock as the Output Edition
- Step 3: Conversion Options
- Step 4: Convert
- Step 5: Save the Bedrock World
- Step 6: Compress the World
- Step 7: Upload Compressed World to iCloud
- Step 8: Import World from iCloud
Step 1: Select the Input Wii U World
To begin, you'll need to tell to the UMT which world you're trying to convert.
Follow this guide to Open a Wii U World in the Universal Minecraft Tool
Step 2: Select Bedrock as the Output Edition
Click Bedrock to select it as the target output edition.
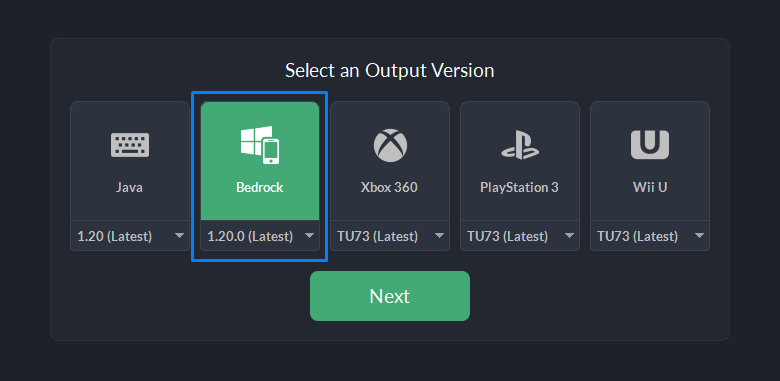
You'll notice a drop-down menu for selecting different target versions. This can be useful if you're trying to get more advanced with your world conversion, but for most cases you'll want to leave it on the latest version.
For reference: Minecraft Wii U edition never made it past 1.6.0 Bedrock equivalent.
Click Next to continue.
Step 3: Conversion Options
This panel allows you to control certain technical aspects of how the conversion should run. Thankfully, for Wii U to Bedrock conversion you'll usually want to leave these at their default values.
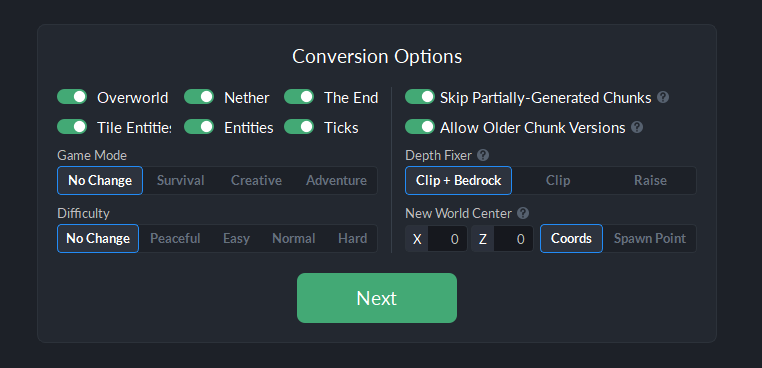
One very important setting you'll likely want to keep enabled is the Allow Older Chunk Versions feature. It is crucial to ensuring you don't have any holes or empty spots in your world.
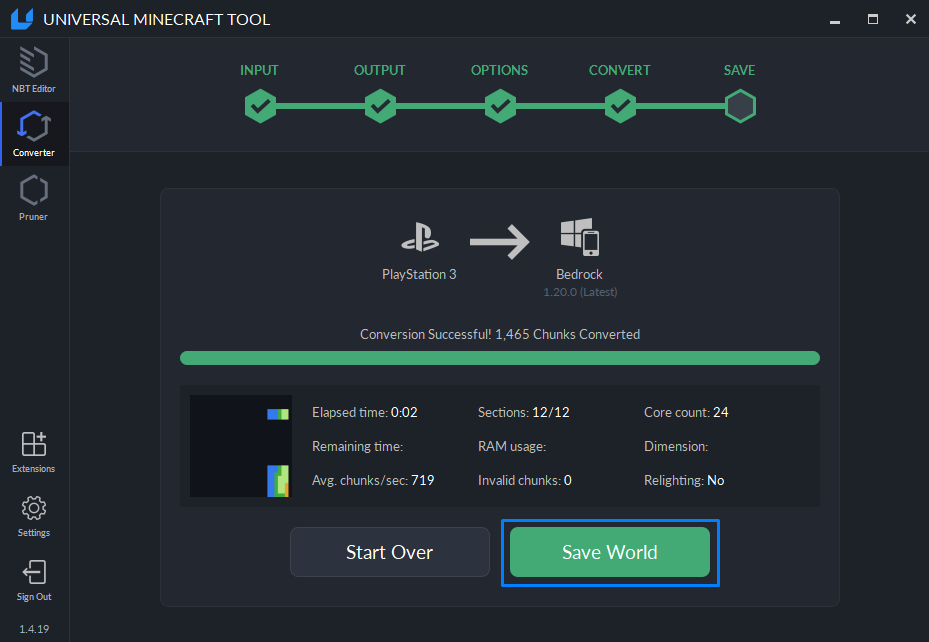
Step 4: Convert
It's the big moment!
Click Start Conversion to begin.
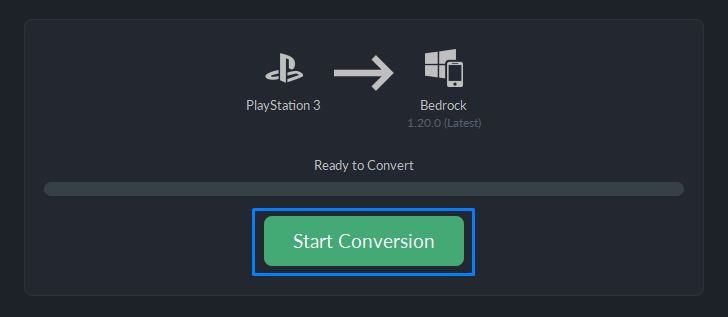
The UMT will now scan the input world and perform all the necessary conversion steps to create a super-accurate clone of your world for Bedrock edition.
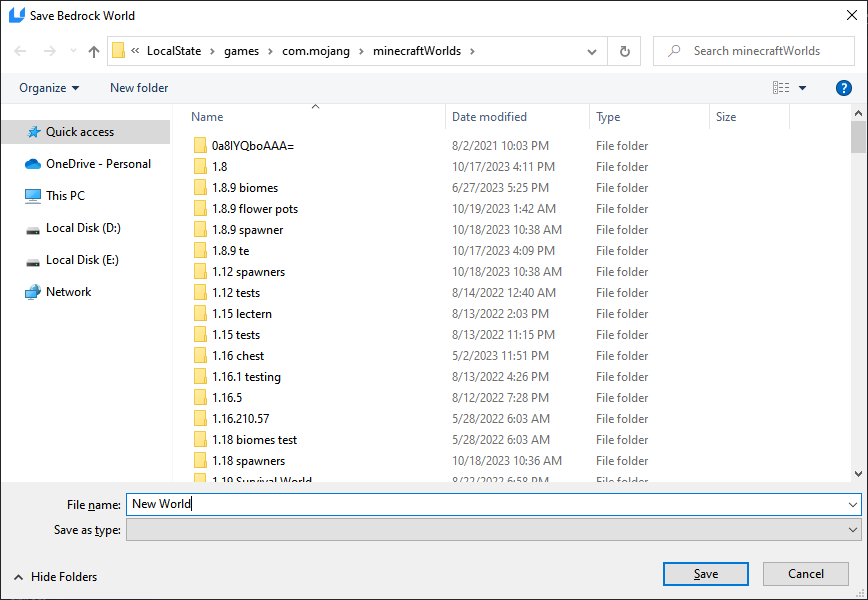
Step 5: Save the Bedrock World
After conversion, pick a spot to save the output world.
Click Save World to bring up the save window.
If you have Minecraft Windows 10 edition installed, the UMT will default to the install location of your Windows 10 edition worlds. However, we don't want to actually install it into Windows 10 edition.
You should instead save it somewhere you can easily find it, like your Desktop.
Enter a name for the world, and click Save.
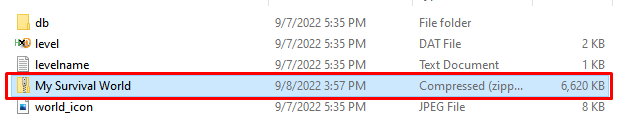
Step 6: Compress the World
Next after conversion is transferring the Bedrock world to our iOS device so it can actually be played.
Open File Explorer and go to where you saved the converted world.
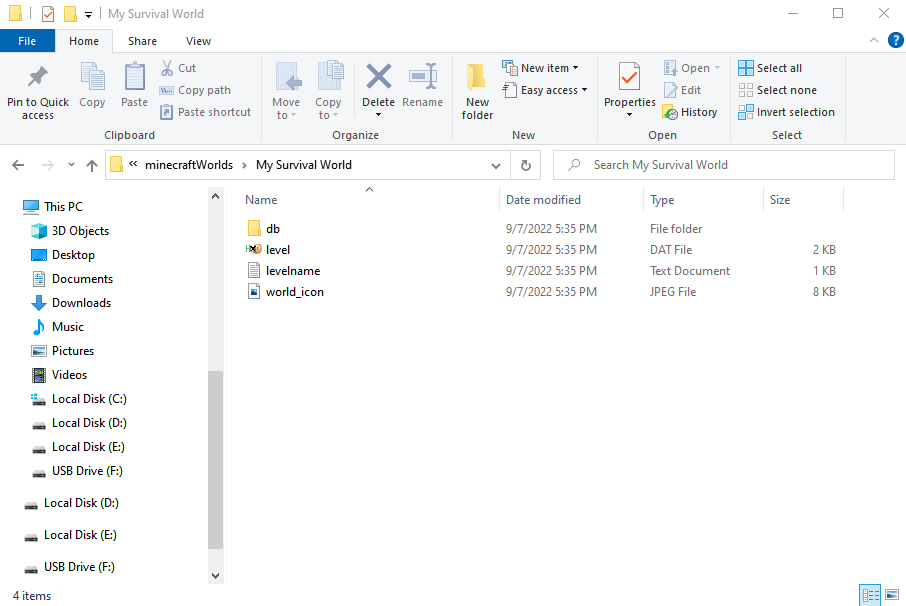
Select everything (Ctrl+A), right click, and choose Send to > Compressed (zipped) folder'.
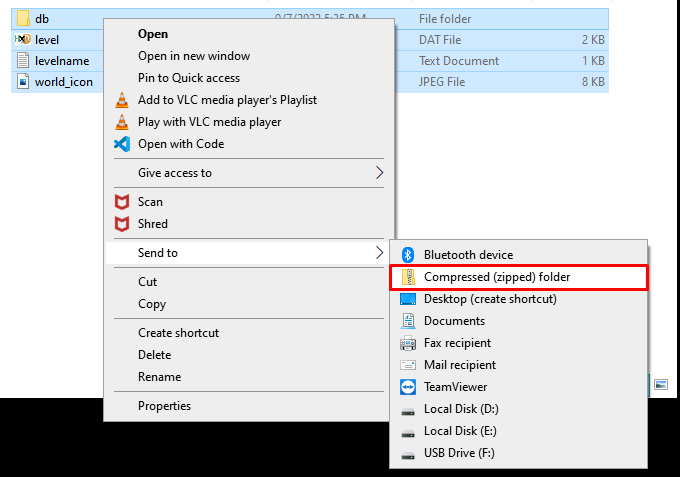
Rename the zip file to something memorable.

Step 7: Upload Compressed World to iCloud
iCloud is an easy way to transfer the converted world to your iOS device. If you have a different transferring method such as Realms, feel free to use that instead.
Sign in to iCloud Drive on a web browser, then click the Upload button.
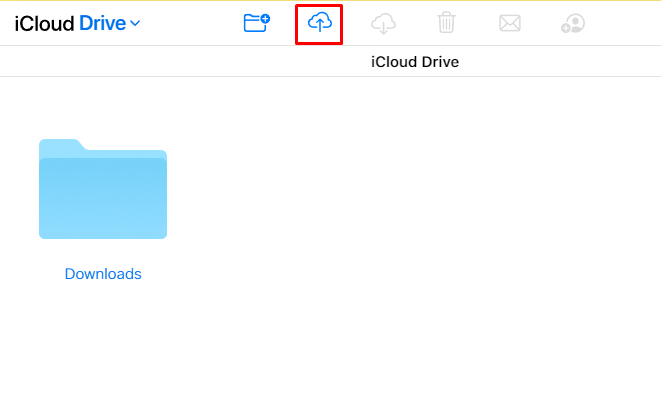
Select the zip file we created earlier.
Step 8: Import World from iCloud
Head on over to your iOS device and go to the Files app. Find the zipped world file we transferred in the previous step in iCloud Drive. Long press it and tap Move. Move the file to On My iPhone > Minecraft > games > com.mojang > minecraftWorlds.
Once it's finished, navigate to that same minecraftWorlds folder we just moved the zipped world file to. Long press it and tap Uncompress. You can now delete the zipped file.
Watch Video:
Congratulations! You've successfully converted and transferred the world to iOS.